


Fast and easy, again. This time it’s swordfish carpaccio with oranges and pistachio nuts. It really takes no time at all and it can be served either as an entrée or as a main course, just adjusting the serving sizes. It’s one of those save-the-day dishes that I often prepare.
Having fresh swordfish from the market is always best, however I sometimes buy the pre-sliced, vacuum-packed stuff they sell at the supermarket, it’s not so bad and it will keep long in your fridge, a quality which turns out to be very useful when you’re having a hectic day and have no time to go to the grocery store. Just one piece of advice if you’re getting the pre-sliced swordfish, I find that the non-smoked kind works better in this dish, it’s closer to the one prepared with fresh ingredients.
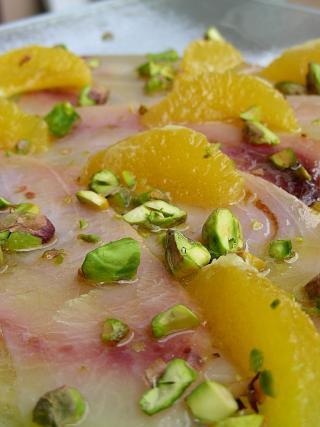
Swordfish carpaccio with oranges and pistachio nuts
150 g swordfish carpaccio – thinly sliced swordfish filet
2 oranges
Freshly squeezed juice from 1 orange
Extra virgin olive oil
Pistachio nuts – to taste, coarsely ground
Salt
These quantities can be used as an entrée for 4 people – I guess you could use 200 g swordfish carpaccio as a main dish to feed 2 people.
Arrange the slices of swordfish on a tray. Combine orange juice, extra virgin olive oil and salt in a vinaigrette-like sauce and pour over the swordfish. Cut out orange wedges and place them on top of the fish. Cover everything with plastic wrap and let it rest for at least half an hour – if you think you’ll take longer, I suggest putting everything into the fridge.
When you’re ready to serve, sprinkle coarsely ground pistachios on top of everything.